
Textured (Popcorn) Ceiling
Step by Step
It is important to follow the instruction provided and use safety gear for your safety.
Equipment
The following equipment is required:
1. Spray Bottle (Optional: Shaving Foam)
2. Spoon
3. Ziplock-type plastic sandwich bag
4. Paper
5. Pen
Sample Site Selection
1. Three areas should be selected and material collected from each site into the same plastic bag.
2. Sites may be in corners, behind curtains, or in closets to minimize visible damage to the ceiling.
3. If texturing has been applied to the ceiling in other rooms, possibly at different times, those rooms should be sampled.
Collecting the Sample
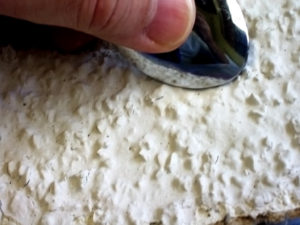
1. Spray the sample site with a little water to minimize dust created by sampling. A small quantity of shaving foam may be used in place of water.
2. Using the spoon, scrape gently down the wallboard using the plastic bag to collect the sample.
3. Repeat steps 1 and 2 at each of the other two sample sites, collecting the material in the same plastic bag.
4. When all three sites have been sampled there should be at least a heaping teaspoon full of material in the bag.
5. Seal the plastic bag.
3. Write the location of the sample on a piece of paper and deposit the sample bag and the piece of paper in a second plastic bag.
The finished sample can be delivered to Microlab Northwest or mailed if well sealed and solidly packaged.
Contact | Privacy | Terms of Use
Copyright © 1978-2022 Microlab Northwest™/MicrolabNW™ All Rights Reserved.
All Information and images contained within may not be copied or reproduced without written permission of MicrolabNW. Some information contained herein has been obtained from sources deemed reliable but not guaranteed.