
Tile, Vinyl, and Linoleum Flooring
Step by Step
It is important to follow the instruction provided and use safety gear for your safety.
Equipment
The following equipment is required:
1. Shaving Foam
2. Knife
3. Flathead Screwdriver
4. Ziplock-type plastic sandwich bag
5. Paper
6. Pen
Sample Site Selection
1. The flooring to be removed can be sampled at the edge of the floor, under cabinets, or under molding. Any other location can be selected but the three listed above would be the easiest to remove and would leave the least visible scar.
Collecting the Sample
1. The shaving foam can be used to minimize dusting at the sample site. Simply deposit a small quantity of foam along the cutlines for the sample before cutting the sample.
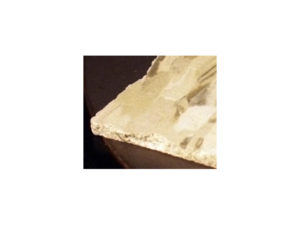
2. At least a 1 square inch piece of flooring should be collected.
3. The flooring should be sampled through all layers of tile, backing mats, and leveling compounds. More shaving foam can be applied whenever dusting is a concern, including during the removal process below (step 4).
4. The flathead screwdriver may be needed to remove the tile from the sub-flooring.
5. Place the flooring sample in the plastic bag.
6. Seal the plastic bag.
7. Write the location of the sample on a piece of paper and deposit the sample bag and the piece of paper in a second plastic bag.
The finished sample can be delivered to Microlab Northwest or mailed if well sealed and solidly packaged.
Contact | Privacy | Terms of Use
Copyright © 1978-2022 Microlab Northwest™/MicrolabNW™ All Rights Reserved.
All Information and images contained within may not be copied or reproduced without written permission of MicrolabNW. Some information contained herein has been obtained from sources deemed reliable but not guaranteed.